Showing posts with label Oracle Identity And Access Manager 11g R2. Show all posts

Thursday, July 16, 2015

Oracle® Identity Manager 11.1.2.2 and SOA 11.1.1.7: Callback and ReqSvc Service Discovery

In a recent project we had to face the challenge of debugging the issues with Callback and Reqsvc Services from SOA to OIM. The  URL doe the services is set during the install and configuration time, however this can be changed by using the following JMX Bean


  • Using the EM console, Navigate to Identity And Access 
  • Right Click on oim(11.1.2.0)
  • Go to the System MBean Browser
  • Navigate to Application Defined MBeans
  • Navigate to oracle.iam
  • Navigate to server_xxxxx (server name)
  • Navigate to XML Config
  • Navigate to Discovery Config


  • On the RHS, for the OimFrontEndURL and OIMExternalFacingFrontEndURL, set the URL of the desired server https:://identitymindtelligent.com:14001


Monday, May 4, 2015

Oracle® Identity & Access Manager / SOA Stack : Find the password for default-keystore.jks and .xldatabasekey keystores and stored keys.

The passwords for the keystores are saved in CSF - Credential Store Framework - filestore ($DOMAIN_ROOT/config/fmwconfig/cwallet.sso) and thus it's accessible via CSF API / Mbeans.


The easiest way to find the password in cleartext is to use the JpsCredentialStore MBean via Enterprise Manager:

1. Login to EM
2. Browse to

   WebLogic Domain -> <Domain> -> System MBean Browser

3. In MBean Browser browse to

   Application Defined MBeans -> com.oracle.jps -> Domain: <Domain>
     -> JpsCredentialStore

4. From Operations tab execute the getPortableCredentialMap operation with
   following parameter:

   Name     Type              Value
   -------- ----------------  ---------------------
   p1       java.lang.String  oim

5. Browse through the provided credential list to get the password
   in human readable form for the entry you are interested in.

Wednesday, May 28, 2014

Configuring an OID Authentication Provider in WebLogic 10.3.6

Configuring an OID Authentication Provider in WebLogic 10.3.6

This is the architecture that depicts the configuration of an OID LDAP-based authentication provider used by OPSS applications deployed on a WebLogic Server environment. 

Follow the steps below to configure an OID authentication provider using the Weblogic Administration Console:
1.Open the Firefox web browser using the  icon on the launch panel. Make sure the WebLogic Server is running before continuing on to the next step.
2.Open the WebLogic Administration Console by browsing to http://localhost:7001/console.
Screenshot for Step
Login using the following credentials:
Username: weblogic
Password: welcome1
Screenshot for Step
3.Click the Security Realms link in the Domain Structure pane to show the list of security realms for the domain.
Screenshot for Step
4.Click the myrealm link in the Realms pane to show the settings for the domain's security realm.
Screenshot for Step
5.Click the Providers tab to show the security providers configured for myrealm.
Screenshot for Step
6.Click the Authentication tab to list the currently configured authentication providers for this domain's security realm. The default out-of-the-box providers are shown for the embedded LDAP authentication provider and identity asserter. This is where you configure the new OID authentication provider.
Screenshot for Step
7.Click New to create a new authentication provider for this domain.
Screenshot for Step
8.The Create a new Authentication Provider page is displayed. Give your new authentication provider a name, such as OID Authenticator, select the type called OracleInternetDirectoryAuthenticator, and click OK.
Screenshot for Step
9.You should now see your new OID authenticator in the list of authentication providers, at the bottom of the list.
Screenshot for Step
10.Click the link for your OID authentication provider to configure its settings.
Screenshot for Step
11.The Settings for OID Authenticator is displayed. Click the Provider Specific tab to configure the detailed settings for this provider.
Screenshot for Step
12.This step guides you through all of the settings for configuring your new OID authentication provider. All the settings are made on a single configuration page, however we go through them one section at a time in this instruction.
The first section contains the Connection settings for the OID server. Use the values from the table below for this section:
NameValuePurpose
Host:localhostThe OID host name
Port:3060The standard OID listening port
Principal:cn=orcladminThe LDAP user that logs into OID on behalf of your authentication provider
Credentials:welcome1Password for the principal user
Confirm Credentials:welcome1Confirmation of the password
SSL Enabled:UncheckedEnables or disables SSL connectivity
Validate your settings against the screen shot below:
Screenshot for Step
The next section contains the Users settings for the OID provider. Use the values from the table below for this section:
NameValuePurpose
User Base DN:cn=Users,dc=us,dc=oracle,dc=comThe root (base DN) of the LDAP tree where searches are performed for user data
All Users Filter:Leave as defaultThe LDAP search filter that is used to show all the users below the User Base DN
User From Name Filter:Leave as defaultThe LDAP search filter used to find the LDAP user by name
User Search Scope:Leave as defaultSpecifies how deep in the LDAP tree to search for users
User Name Attribute:Leave as defaultThe attribute of the LDAP user that specifies the user name
User Object Class:Leave as defaultThe LDAP object class that stores users
Use Retrieved User Name as Principal:CheckedSpecifies if the user name retrieved from the LDAP directory will be used as the Principal in the Subject
Validate your settings against the screen shot below:
Screenshot for Step
The next section contains the Groups settings for the OID provider. Use the values from the table below for this section:
NameValuePurpose
Group Base DN:cn=Groups,dc=us,dc=oracle,dc=comThe root (base DN) of the LDAP tree where searches are performed for group data
All Groups Filter:Leave as defaultThe LDAP search filter that is used to show all the groups below the Group Base DN
Group From Name Filter:Leave as defaultThe LDAP search filter used to find the LDAP group by name
Group Search Scope:Leave as defaultSpecifies how deep in the LDAP tree to search for groups
Group Membership Searching:Leave as defaultSpecifies whether group searches into nested groups are limited or unlimited
Max Group Membership Search Level:Leave as defaultSpecifies how many levels of group membership can be searched. This setting is only valid if GroupMembershipSearching is set to limited
Ignore Duplicate Membership:UncheckedDetermines whether duplicates members are ignored when adding groups.
Validate your settings against the screen shot below:
Screenshot for Step
Click Save to persist your changes.
Screenshot for Step
13.Click the Common tab in the Settings for OID Authenticator pane to show settings common to all authentication providers.
Screenshot for Step
14.Change the Control Flag setting to SUFFICIENT and click Save. This setting allows this provider to participate in the authentication process without requiring the user to be in its identity store.
Screenshot for Step
15.Click the Providers link the breadcrumb displayed near the top of the page to quickly navigate back to theAuthentication Providers page.
Screenshot for Step
16.Click the DefaultAuthenticator link to display its common settings so you can change its control flag toSUFFICIENT as well.
Screenshot for Step
17.Change the Control Flag setting to SUFFICIENT and click Save. This setting allows this provider to participate in the authentication process without requiring the user to be in its identity store.
Screenshot for Step
18.Click the Providers link the breadcrumb displayed near the top of the page to quickly navigate back to theAuthentication Providers page.
Screenshot for Step
19.Click Reorder to change the order of your configured authentication providers.
If you remember from the OPSS Concepts self-study course, OPSS obtains its authentication configuration from the authentication provider configuration found in the WebLogic Server domain. It also states that OPSS first looks at all of the LDAP-based authentication providers in the list, and chooses the first one in the list with the highest control flag setting. Because we configured both LDAP-based authentication providers to use the SUFFICIENTcontrol flag setting, OPSS would use the default authenticator if we left the configuration as it is now. In order to ensure that OPSS recognizes your new OID authenticator as its authentication provider, you must reorder your list of authentication providers so that the OID authentication provider is first in the list.
Screenshot for Step
20.Select the OID Authenticator and use the arrows on the right to move it into the first position. Click OK.
Screenshot for Step


Monday, March 31, 2014

OIM 11.1.2.2 : Check OIM Scheduler Status Without Logging In

OIM 11.1.2.2 :  Check OIM Scheduler Status Without Logging In 

Change the localhost and port 8080 below to your OIM server's hostname and port number

import java.io.BufferedReader;
import java.io.InputStream;
import java.io.InputStreamReader;
import java.net.URL;
import java.net.URLConnection;

public class CheckSchedulerStatus{

  public CheckSchedulerStatus(){

  }

  public void SchedulerStatus(){

   try{

    URL url = null;
    URLConnection urlconn = null;
    url =new URL("http://mindtelligent-d:14000/xlScheduler/ddstatus");
    urlconn = url.openConnection();

    urlconn.connect();
    InputStream response =urlconn.getInputStream();
    StringBuffer buffer = new StringBuffer();
    BufferedReader dataInput =
     new BufferedReader(new InputStreamReader(response));
    String line;
    while ((line = dataInput.readLine()) != null) {
     buffer.append(line);
     buffer.append('\n');
    }   if(buffer.toString().toUpperCase().indexOf("STARTED")!=-1){
System.out.println("Scheduler Status: " + "STARTED");
    }
    else    if(buffer.toString().toUpperCase().indexOf("STOPPED")!=-1){
System.out.println("Scheduler Status: " + "STOPPED");

     int stackTraceLocation = buffer.toString().indexOf("Detaild Stack Trace follows");
     if (stackTraceLocation > -1) {
      int stackTraceBeingIndex = buffer.toString().indexOf("<PRE>",stackTraceLocation)+5; 
      int stackTraceEndIndex = buffer.toString().indexOf("</PRE>",stackTraceLocation); 
      String stackTrace = buffer.toString().substring(stackTraceBeingIndex,stackTraceEndIndex);
System.out.println(stackTrace);
     }


    }
  }

  catch(Exception e){
   e.printStackTrace();

  }

 }
  public static void main(String[] args){

   CheckSchedulerStatus chckSch = new CheckSchedulerStatus();
   chckSch.SchedulerStatus();
  }
}

Sunday, June 9, 2013

OIM 11g Release 2 (11.1.2) Download, Installation, and Configuration- Part 5 Configuring Database Security Store for an Oracle Identity and Access Management Domain

OIM 11g Release 2 (11.1.2) Download, Installation, and Configuration- Part 5 Configuring Database Security Store for an Oracle Identity and Access Management Domain


You must run the configureSecurityStore.py script to configure the Database
Security Store as it is the only security store type supported by the Oracle Identity &

Access Management 11g Release 2 (11.1.2).

The configureSecurityStore.py script is located in the <IAM_
HOME>\common\tools directory. You can use the -h option for help information
about using the script. Note that not all arguments will apply to configuring the
Database Security Store.
For example:
On Windows:
<MW_HOME>\oracle_common\common\bin\wlst.cmd <IAM_
HOME>\common\tools\configureSecurityStore.py -h
On UNIX:
<MW_HOME>/oracle_common/common/bin/wlst.sh <IAM_
HOME>/common/tools/configureSecurityStore.py -h


Configuring the Database Security Store Using Create Option

To configure a domain to use a database security store using the -m create option,
you must run the configureSecurityStore.py script as follows:
On Windows:
<MW_HOME>\oracle_common\common\bin\wlst.cmd <IAM_
HOME>\common\tools\configureSecurityStore.py -d <domaindir> -c IAM -p <opss_
schema_password> -m create
For example:
C:\OIM\Oracle\Middleware\oracle_common\common\bin\wlst.cmd C:\OIM\Oracle\Middleware\Oracle_IDM1\common\tools\configureSecurityStore.py -d C:\OIM\Oracle\Middleware\user_projects\domains\base_domain -c IAM -p welcome1-m create 
On UNIX:
<MW_HOME>/oracle_common/common/bin/wlst.sh <IAM_
HOME>/common/tools/configureSecurityStore.py -d <domaindir> -c IAM -p <opss_schema_password> -m create


wls:/offline> C:/OIAM/Middleware/Oracle_IDM1/common/tools/configureSecurityStore.py -d C:/OIAM/Middleware/user_projects/domains/base_domain -c IAM -p Welcome1
-m create

On successful execution of this script, you should see following screen status


OIM 11g Release 2 (11.1.2) Download, Installation, and Configuration- Part 2 Repository Creation Utility

OIM 11g Release 2 (11.1.2) Download, Installation, and Configuration- Part 2 Repository Creation Utility

  • Please view the Part 1 of this thread. Installation of JDK and Weblogic Server 
  • Download Oracle Fusion Middleware Repository Creation Utility 11g (11.1.2.1.0) for Microsoft Windows (32-bit)
  • Unzip the downloaded RCU file. Navigate to RCU_HOME/bin directory and run utility


  • Launch of rcu will bring the following screen. Click Next.


  • Choose the option to Create


  • Enter Database Information Host, Port, Service Name, Username and Password.


  • Click OK on Checking Prerequisites window.


  • Choose the Components to be created. Press Next 

  • Enter the password for all schemas and press Next


  • Press Create

  • Press Close when done.


OIM 11.1.2 R2: Install AD connector on Connector Server

OIM 11.1.2 R2: Install AD connector on Connector Server

Prior to installing the AD connector on the connector server, please ensure that the connector server is installed is installed. Please click here for more details on installation of connector server.


1.       Stop the Connector Server.

2.       From the installation media, copy the ActiveDirectory.Connector-1.1.0.6380.zip file from the bundle directory to the CONNECTOR_SERVER_HOME directory. For Example: C:\Program Files\Identity Connectors\Connector Server. And unzip the ActiveDirectory.Connector-1.1.0.6380.zip file there. The contents of zip file should be directly in Connector Server directory.


3.       Delete the zip file and start the Connector Server Service for the connector bundle to be picked up by the Connector Server.

OIM 11g Release 2 (11.1.2) Download, Installation, and Configuration- Part 6 Configure Oracle Identity Manager Server.

OIM 11g Release 2 (11.1.2) Download, Installation, and Configuration- Part 6 Configure Oracle Identity Manager Server.


  • Start the Administrator server $FM_HOME\user_projects\domains\base_domain\startWeblogic.cmd
  • To start the Oracle Identity Manager 11g Configuration Wizard, execute the <IAM_Home>/bin/config.sh script (on UNIX) on the machine where the Administration Server is running. (<IAM_Home>\bin\config.bat on Windows). The Oracle Identity Manager 11g Configuration Wizard starts, and the Welcome Screen appears.

  • Select OIM Server, Design console and Remote Manager


  • Enter Connection string and Infrastructure Information, press Next

  • Enter Weblogic Server URL, Username and Password


Sunday, June 2, 2013

OIM 11.1.2.2 : Deploying the SPML-DSML Service

OIM 11.1.2.2 : Deploying the SPML-DSML Service

1. Log in to the Oracle WebLogic Server Administration Console.


2. In the Change Center region, click Lock & Edit to enable modification to the settings on the page.

3. In the Domain Structure region, click Deployments.


4. On the right pane, click Install.


5. On the Locate deployment to install and prepare for deployment page, in the Path field, enter      
    OIM_HOME\server\apps. 


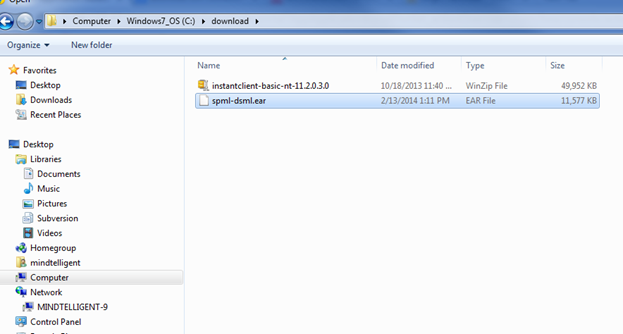
6. In the region following the Current Location field, select spml-dsml.ear and then click Next.


7. On the Choose targeting style page, click Next to accept the default selection and proceed with            installation.


8. On the Select deployment targets page, in the Available targets for spml-dsml region, select oim_server1 if Oracle Identity Manager is installed in a nonclustered environment. Otherwise, select oim_cluster.


9. Click Next.

10. On the Optional Settings page, in the Source accessibility region, select I will make the deployment accessible from the following location, and then click Next.


11. On the Review your choices and click Finish page, verify the data that you have provided, and then click Finish.


12. On the Settings for spml-dsml page, review the configuration information of the deployed SPML-DSML Service, and then click Save.


13. In the Change Center region, click Activate Changes for the changes to take effect.

14. On the left pane, in the Domain Structure region, click Deployments. 


15. On the right pane, in the Deployments table, select spml-dsml, and then from the Start list, select Servicing all requests. The SPML-DSML Service is started.


16 For Oracle WebLogic Server:
http://IP ADDRESS:NON-SSL PORT NUMBER/spmlws/OIMProvisioning

https://IP ADDRESS:SSL PORT NUMBER/spmlws/OIMProvisioning

How IdP Groups Are Tied to Databricks Groups (Unity Catalog)

  🔗 How IdP Groups Are Tied to Databricks Groups (Unity Catalog) 🔑 Key Principle (Read This First) Databricks does NOT “map” IdP groups...