Sunday, June 2, 2013

OIM 11.1.2.2 : Deploying the SPML-DSML Service

OIM 11.1.2.2 : Deploying the SPML-DSML Service

1. Log in to the Oracle WebLogic Server Administration Console.


2. In the Change Center region, click Lock & Edit to enable modification to the settings on the page.

3. In the Domain Structure region, click Deployments.


4. On the right pane, click Install.



5. On the Locate deployment to install and prepare for deployment page, in the Path field, enter      
    OIM_HOME\server\apps. 
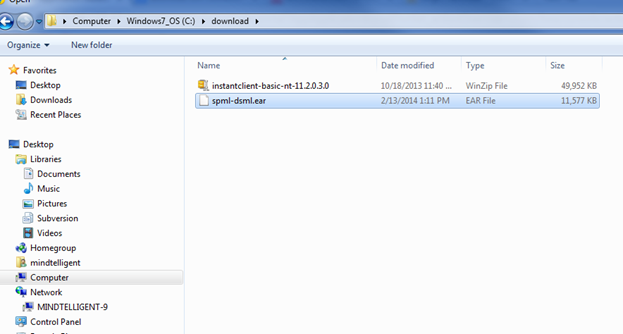


6. In the region following the Current Location field, select spml-dsml.ear and then click Next.


7. On the Choose targeting style page, click Next to accept the default selection and proceed with            installation.


8. On the Select deployment targets page, in the Available targets for spml-dsml region, select oim_server1 if Oracle Identity Manager is installed in a nonclustered environment. Otherwise, select oim_cluster.


9. Click Next.

10. On the Optional Settings page, in the Source accessibility region, select I will make the deployment accessible from the following location, and then click Next.


11. On the Review your choices and click Finish page, verify the data that you have provided, and then click Finish.


12. On the Settings for spml-dsml page, review the configuration information of the deployed SPML-DSML Service, and then click Save.


13. In the Change Center region, click Activate Changes for the changes to take effect.

14. On the left pane, in the Domain Structure region, click Deployments. 


15. On the right pane, in the Deployments table, select spml-dsml, and then from the Start list, select Servicing all requests. The SPML-DSML Service is started.


16 For Oracle WebLogic Server:
http://IP ADDRESS:NON-SSL PORT NUMBER/spmlws/OIMProvisioning

https://IP ADDRESS:SSL PORT NUMBER/spmlws/OIMProvisioning

Sunday, May 12, 2013

OIM 11.1.2 R2: Installation of Connector Server


OIM 11.1.2 R2: Installation of Connector Server

The connector server is the Windows server. Before installing the Connector Server, ensure that .NET Framework 3.5 or above is installed on the same server where we are installing the Connector Server.
1.       Login on the Windows server (as referred as Dot Net Connector server)
2.       Extract the contents of the Connector Server package (Connector_Server_111210.zip) and locate the ServiceInstall-1.4.0.0.msi file.
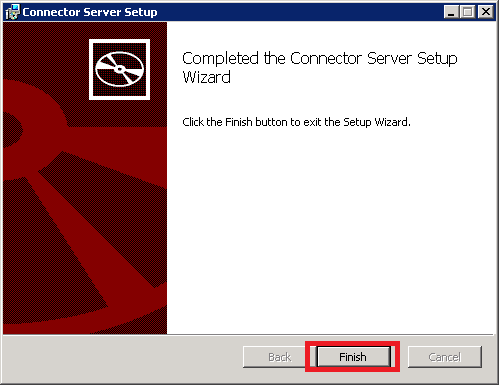
3.       Install the Connector Server by running the ServiceInstall-1.4.0.0.msi file and following the wizard. The wizard takes you through the installation process step-by-step. After completion, the .NET Connector Server is registered as a Windows service.


4.  Start the Microsoft Services Console.
5.       If the .NET Connector Server is running, stop it by stopping the Windows service named Connector Server.
6.       To set a custom key for the .NET Connector Server, use the /setkey command-line argument, as follows:
a.       Change to the directory where the .NET Connector Server was installed. The default directory is:
C:\Program Files\Identity Connectors\Connector Server
b.      Run the following command:
ConnectorServer.exe /setkey NEW_KEY
In this command, NEW_KEY is the value for the new key. This key is required by any client that connects to this .NET Connector Server.
7.       Check the settings in the .NET Connector Server configuration file (ConnectorServer.exe.config). These settings are in the element named AppSettings. For example:
<add key="connectorserver.port" value="8759" />
<add key="connectorserver.usessl" value="false" />
<add key="connectorserver.certificatestorename" value="ConnectorServerSSLCertificate" />
<add key="connectorserver.ifaddress" value="0.0.0.0" />
Note: The most common settings you might want to change are:
ü  Port number: To change the port, set connectorserver.port to a value other than 8759 (If require in Production. For example: port enablement or Firewall issue).
Note: This port should be accessible from OIM server (Firewall opened)
ü  SSL settings: To use SSL, set connectorserver.usessl to true and then set connectorserver.certificatestorename to your certificate store name. (If the SSL is implemented)
8.       Save the following configuration information from the .NET Connector Server installation. This information must be specified while configuring the IT resource for the Connector Server:
ü  Host name or IP address
ü  Connector Server port
ü  Connector Server key values
ü  Whether SSL is enabled

9.       Restart Connector Server by restarting the Windows service.

Creating a wlfullclient.jar for JDK 1.6 client applications

Creating a wlfullclient.jar for JDK 1.6 client applications


Use the following steps to create a wlfullclient.jar file for a JDK 1.6 client application:
  1.  Change directories to the server/lib directory.
  2. cd WL_HOME/server/lib
  3.  Use the following command to create wlfullclient.jar in the server/lib directory:
  4. java -jar wljarbuilder.jar
  5.  You can now copy and bundle the wlfullclient.jar with client applications.
  6.  Add the wlfullclient.jar to the client application’s classpath.

Wednesday, May 8, 2013

Oracle SOA 11.1.1.6 Create RMA (Return Merchandise Authorization) using Oracle SOA B2B on AS2 Part 2

Oracle SOA 11.1.1.6 Create RMA (Return Merchandise Authorization) using Oracle SOA B2B on AS2 Part 2

Please refer to my earlier post on Generation of 180 B2B artifacts by navigating to the thread
Oracle SOA 11.1.1.6 Create RMA (Return Merchandise Authorization) using Oracle SOA B2B on AS2 Part 1

This thread discuss configuration of the AS2 communication channel using B2B console. To navigate to the SOA B2B console , please use the URL http://hostname:port/b2bconsole where hotname is the name of the host where Oracle SOA stack with b2B is installed, port is the port where the SOA Managed Server is listening.

1.) Click on administration.

2.) Click on document.

3.) Click on Document Types (EDI X12)

4.) Create a Version Type. (4010)

5.) Create a Document Type 180.

6.) Create Document Definition  by using the XSD and ECS file that were created using document Editor.


Sunday, April 28, 2013

PKCS Keystore using KeyTools

PKCS Keystore using KeyTools


To create a keystore of PKCS12 type (.pfx) you have to specify it with -storetype PKCS12:


keytool -genkey -alias {desired alias certificate} -keystore {path to keystore.pfx} -storepass {password} -validity 365 -keyalg RSA -keysize 2048 -storetype pkcs12


Sunday, April 14, 2013

OIM 11g Release 2 (11.1.2) Download, Installation, and Configuration- Part 1 Installation of Weblogic 10.3.6 on a 64 bit platform

 OIM 11g Release 2 (11.1.2) Download, Installation, and Configuration- Part 1 Installation of Weblogic 10.3.6 on a 64 bit platform

This thread discusses the installation, configuration of  OIM 11g Release 2 (11.1.2)

Oracle Identity and Access Management 11g Release 2 (11.1.2) ProductFull or Patch Set Installer?Download Instructions
Oracle Identity and Access ManagementFullDownload Oracle Identity and Access Management 11g Release 2 (11.1.2) from Oracle Software Delivery Cloud.
Oracle Unified DirectoryFullDownload Oracle Unified Directory 11g Release 2 (11.1.2) from the Oracle Software Delivery Cloud.


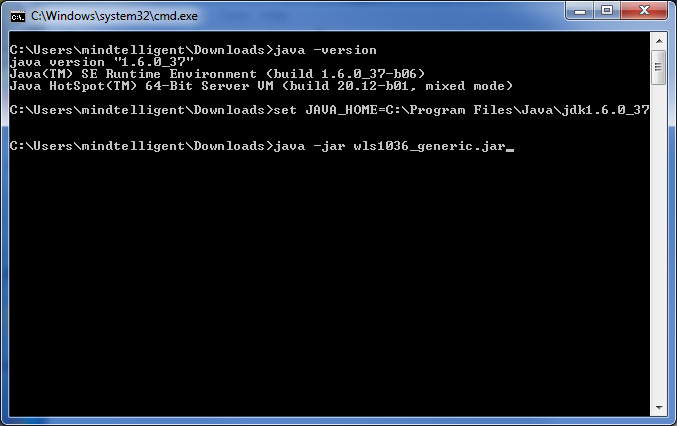
If you are installing WebLogic Server on a 64-bit platform using a .jar installation program:
  • Add the directory of the appropriate JDK to the PATH variable definition on the target system. For example, on UNIX, add the bin directory of the appropriate 64-bit JDK to the beginning of the PATH variable definition on the target system:
    JAVA_HOME=path_to_64-bit_JDK; export JAVA_HOME
    PATH=$JAVA_HOME/bin:$PATH; export PATH


  • (UNIX or Linux only) Include the -d64 flag in the installation command when using a 32/64-bit hybrid JDK (such as for the HP-PA, HPIA, and Solaris64 platforms). For example, if installing in graphical mode using the Package installer:
    java -d64 -jar wlsversion_generic.jar
  • Run the java -version command (or java -d64 -version command on UNIX or Linux platforms using a 32/64-bit hybrid JDK) to ensure that yourJAVA_HOME refers to a 64-bit JDK.
  • If you are using the Sun 64-bit JDK, use the following command to install WebLogic Server:
    java -Xmx1024m -jar wlsversion_generic.jar


    On the Oracle Instaler - weblogic 10.3.6 window, click next


    Chose the option to create a new Middleware Home, enter C:\OIAM\Middleware as directory path
    Click Next


    Choose the Option for typical install, click Next


    Confirm the Middleware home and Coherence home, click Next


    Installation completed. click Done


Sunday, April 7, 2013

OIM 11g Release 2 (11.1.2) Download, Installation, and Configuration- Part 3 Installation of SOA 11.1.1.6

OIM 11g Release 2 (11.1.2) Download, Installation, and Configuration- Part 3 Installation of SOA 11.1.1.6


  • Choose Oracle Middleware Home Oracle and press next


  • Choose Weblogic Server and Press Next.


  • Press Install


  • Validate if Installation was 100% Press Next and Press Finish


How IdP Groups Are Tied to Databricks Groups (Unity Catalog)

  🔗 How IdP Groups Are Tied to Databricks Groups (Unity Catalog) 🔑 Key Principle (Read This First) Databricks does NOT “map” IdP groups...