Saturday, July 16, 2022

SpringBoot API to return compressed CSV file

Here's an example of a Spring Boot Controller that accepts a request payload of type EmployeeRequest, generates a CSV file based on the input data, compresses the file into a ZIP, and returns the zipped file as a response:


Spring Boot Controller

java

import org.apache.commons.csv.CSVFormat; import org.apache.commons.csv.CSVPrinter; import org.springframework.http.HttpHeaders; import org.springframework.http.MediaType; import org.springframework.http.ResponseEntity; import org.springframework.web.bind.annotation.*; import org.springframework.web.servlet.mvc.method.annotation.StreamingResponseBody; import java.io.*; import java.util.zip.ZipEntry; import java.util.zip.ZipOutputStream; @RestController @RequestMapping("/api/employee") public class EmployeeController { @PostMapping("/generate") public ResponseEntity<StreamingResponseBody> generateZippedCsv(@RequestBody EmployeeRequest request) { StreamingResponseBody responseBody = outputStream -> { // Create CSV in memory ByteArrayOutputStream csvOutputStream = new ByteArrayOutputStream(); try (CSVPrinter csvPrinter = new CSVPrinter(new PrintWriter(csvOutputStream), CSVFormat.DEFAULT)) { // Add CSV Headers csvPrinter.printRecord("First Name", "Last Name", "Middle Name", "Date of Birth"); // Populate CSV rows with request data for (Employee employee : request.getEmployees()) { csvPrinter.printRecord( employee.getFirstName(), employee.getLastName(), employee.getMiddleName(), employee.getDateOfBirth() ); } } // Create ZIP containing the CSV try (ZipOutputStream zipOutputStream = new ZipOutputStream(outputStream)) { zipOutputStream.putNextEntry(new ZipEntry("employees.csv")); zipOutputStream.write(csvOutputStream.toByteArray()); zipOutputStream.closeEntry(); } }; // Set headers for ZIP file download HttpHeaders headers = new HttpHeaders(); headers.setContentType(MediaType.APPLICATION_OCTET_STREAM); headers.set(HttpHeaders.CONTENT_DISPOSITION, "attachment; filename=\"employees.zip\""); return ResponseEntity.ok() .headers(headers) .body(responseBody); } }

Supporting Classes

EmployeeRequest

This class represents the input request payload that contains a list of employees.

java

import java.util.List; public class EmployeeRequest { private List<Employee> employees; // Getters and Setters public List<Employee> getEmployees() { return employees; } public void setEmployees(List<Employee> employees) { this.employees = employees; } }

Employee

This class represents the individual employee data.

java

public class Employee { private String firstName; private String lastName; private String middleName; private String dateOfBirth; // Use String for simplicity; can use LocalDate or Date instead // Getters and Setters public String getFirstName() { return firstName; } public void setFirstName(String firstName) { this.firstName = firstName; } public String getLastName() { return lastName; } public void setLastName(String lastName) { this.lastName = lastName; } public String getMiddleName() { return middleName; } public void setMiddleName(String middleName) { this.middleName = middleName; } public String getDateOfBirth() { return dateOfBirth; } public void setDateOfBirth(String dateOfBirth) { this.dateOfBirth = dateOfBirth; } } 
 

How It Works

  1. Input: The API receives a JSON payload containing a list of employees with their details (firstNamelastNamemiddleName, and dateOfBirth).
  2. CSV Generation: It generates a CSV file with these details in memory.
  3. ZIP Compression: The CSV file is compressed into a ZIP archive.
  4. Response: The ZIP file is returned to the client with appropriate headers for file download.


Example Request

POST Request

http

POST /api/employee/generate Content-Type: application/json

Request Body

json

{ "employees": [ { "firstName": "John", "lastName": "Doe", "middleName": "A.", "dateOfBirth": "1985-03-15" }, { "firstName": "Jane", "lastName": "Smith", "middleName": "B.", "dateOfBirth": "1990-07-21" } ] }

Response

The API returns a employees.zip file containing the CSV file. The CSV will look like this:

csv

First Name,Last Name,Middle Name,Date of Birth John,Doe,A.,1985-03-15 Jane,Smith,B.,1990-07-21


1. Spring Boot Configuration Limits

Spring Boot uses Servlet multipart handling for file uploads and responses. The maximum file size is governed by the spring.servlet.multipart properties:

  • spring.servlet.multipart.max-file-size:

    • Limits the maximum size of a single uploaded file or generated response.
    • Default: 1MB.
  • spring.servlet.multipart.max-request-size:

    • Limits the total size of all files in a multipart request or response.
    • Default: 10MB.

Example Configuration in application.properties:

properties

spring.servlet.multipart.max-file-size=100MB spring.servlet.multipart.max-request-size=100MB

2. Server-Specific Limits

Your server configuration (e.g., Tomcat, Jetty) also enforces limits:

Tomcat:

  • server.tomcat.max-swallow-size: Specifies the maximum size of a request body or response.
    • Default: 2MB.
    • Set -1 for no limit.

Example:

properties

server.tomcat.max-swallow-size=-1

Other Servers:

  • Jetty, Undertow, or other embedded servers might have similar settings for request/response size limits. Check their documentation for details.

3. JVM Memory Limits

Your application must have enough memory to handle large files, especially for:

  • In-Memory Operations: When files are stored or manipulated in memory (e.g., CSV generation or zipping).
  • Heap Space: Ensure your JVM has adequate heap memory to avoid OutOfMemoryError.

JVM Options:

bash

-Xms512M -Xmx2G

This example sets the JVM to use 512MB initial memory and 2GB maximum memory.


4. Operating System Limits

The underlying operating system may impose limits on:

  • Temporary File Storage: For file uploads or in-memory buffers, check /tmp (or equivalent) storage space.
  • Maximum Open File Handles: Ensure you are not exceeding the file descriptor limits, particularly in high-concurrency scenarios.

5. Practical Limits for Download Responses

For downloading files (like a CSV zipped file):

  • StreamingResponseBody: Use it to stream large files directly to the response output stream, avoiding in-memory buffering.
  • This approach minimizes memory usage, allowing responses to exceed typical memory constraints.

6. Network Bandwidth

Large file downloads are also affected by:

  • Network bandwidth between the server and the client.
  • Timeouts due to prolonged transfers.

Ensure:

  • Timeouts are configured appropriately (server.connection-timeout in Spring Boot).
  • Clients can handle large file downloads.

Summary

  • Default Spring Boot limits are 1MB per file and 10MB per request.
  • You can increase these limits using properties like spring.servlet.multipart.max-file-size.
  • Use StreamingResponseBody for large file downloads to avoid memory bottlenecks.
  • Monitor JVM memory, server configurations, and OS limits to ensure performance and reliability.

If you are working with extremely large files (e.g., several GB), consider a more robust solution like:

  • Direct S3 File Downloads: Upload the file to AWS S3 and share a pre-signed URL.
  • Chunked File Downloads: Break the file into smaller chunks for transmission.

Monday, December 6, 2021

Creating an Aurora Database Instance with AWS CDK (Python) and Secret Manager

 Title: Creating an Aurora Database Instance with AWS CDK (Python) and Secret Manager


Introduction:

In this blog post, we will walk through the process of creating an Amazon Aurora database instance using AWS Cloud Development Kit (CDK) with Python. Additionally, we'll enhance the security of our application by utilizing AWS Secrets Manager to manage and retrieve our database credentials.


Prerequisites:

Before we begin, make sure you have the following prerequisites:


1. AWS CDK installed: [CDK Installation Guide](https://docs.aws.amazon.com/cdk/latest/guide/getting_started.html)

2. Python installed: [Python Installation Guide](https://www.python.org/downloads/)


Step 1: Set Up Your CDK Project

Create a new directory for your CDK project and navigate to it in your terminal.


mkdir aurora-cdk

cd aurora-cdk


Initialize your CDK project.


cdk init app --language python


Step 2: Install Required CDK Libraries

Install the necessary CDK libraries for Amazon Aurora and Secrets Manager.


pip install aws-cdk.aws-rds aws-cdk.aws-secretsmanager


Step 3: Import Dependencies in Your CDK App

Open the `app.py` file in your favorite code editor and import the required CDK modules.


from aws_cdk import (

    core,

    aws_rds as rds,

    aws_secretsmanager as secretsmanager

)


 Step 4: Define the CDK Stack

Define your CDK stack by creating a class that inherits from `core.Stack`. Inside the class, define the Aurora database instance and the Secrets Manager secret.


class AuroraCdkStack(core.Stack):


    def __init__(self, scope: core.Construct, id: str, **kwargs) -> None:

        super().__init__(scope, id, **kwargs)


        # Create a Secrets Manager secret for database credentials

        secret = secretsmanager.Secret(

            self,

            "AuroraSecret",

            secret_name="AuroraCredentials",

            generate_secret_string=secretsmanager.SecretStringGenerator(

                secret_string_template='{"username": "admin"}',

                generate_string_key="password",

                exclude_characters='"@/',

            )

        )


        # Create an Aurora database instance

        aurora_db = rds.DatabaseInstance(

            self,

            "AuroraDB",

            engine=rds.DatabaseInstanceEngine.aurora_postgres,

            master_username=secret.secret_value_from_json("username").to_string(),

            master_password=secret.secret_value_from_json("password").to_string(),

            instance_class=core.Fn.select(0, ["db.t3.small"]),

            vpc_subnets={"subnet_type": core.SubnetType.PRIVATE},

            removal_policy=core.RemovalPolicy.DESTROY  # WARNING: Do not use in production

        )


Step 5: Deploy Your CDK Stack

Deploy your CDK stack to create the Aurora database instance.


cdk deploy


### Conclusion:

Congratulations! You have successfully created an Amazon Aurora database instance using AWS CDK with Python. By integrating AWS Secrets Manager, you've enhanced the security of your application by securely managing and retrieving your database credentials.


Remember to manage your secrets and credentials responsibly, and never expose sensitive information in your code or configuration files.

Monday, October 11, 2021

Install Python 3.8 on Amaxon Linux 2


Install Python 3.8 on Amazon Linux 2

This thread  focuses on installation Python 3.8 on Amazon Linux 2.

Install from amazon-linux-extras repository

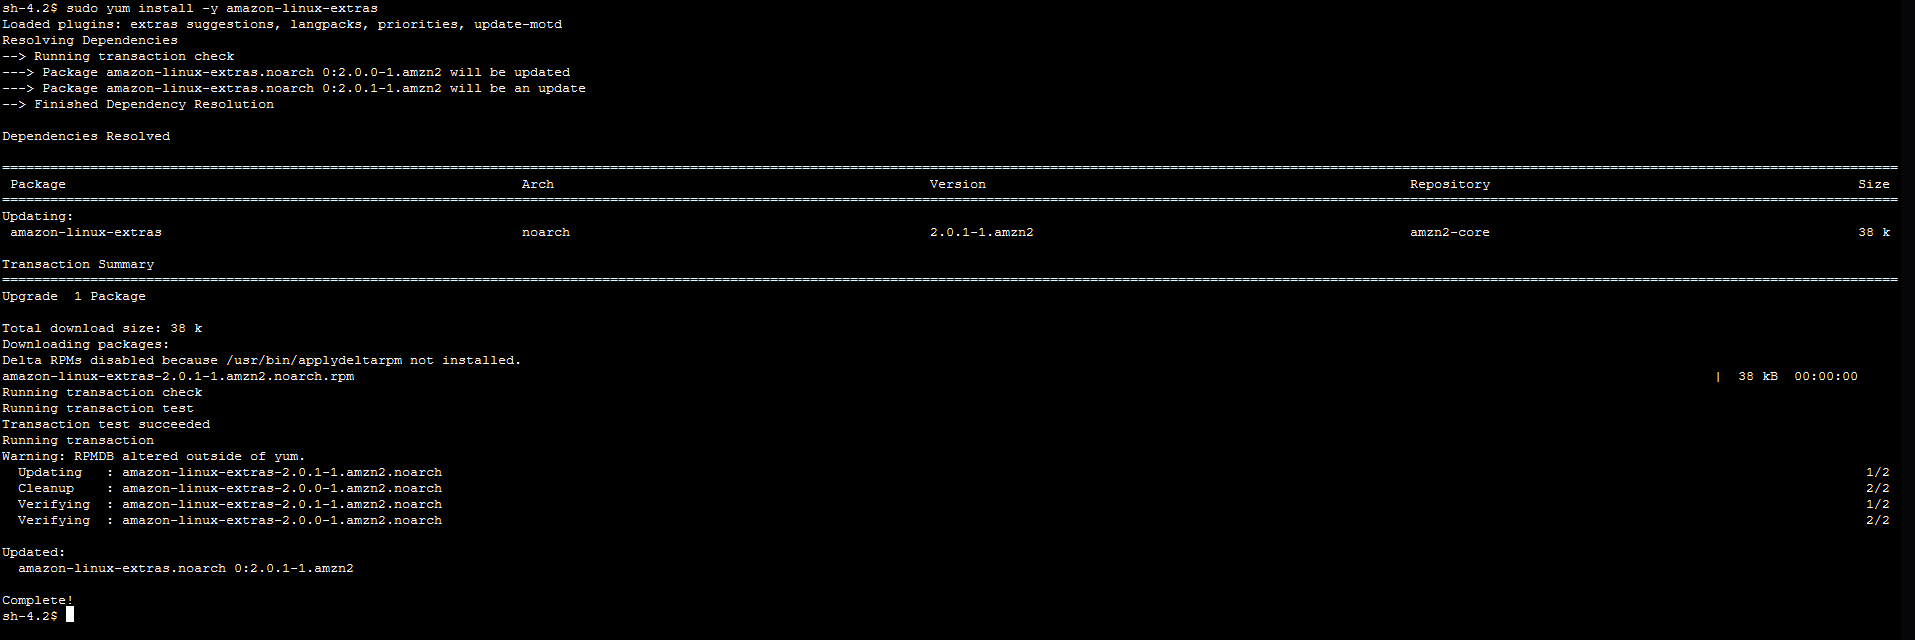
  • To install 3.8 on Amazon Linux 2, you need to have amazon-linux-extras repository installed. 
    • sudo yum install -y amazon-linux-extras 


  • Confirm that Python 3.8 packages available on the repository.  
    • amazon-linux-extras | grep -i python
       
You should see the following:

44  python3.8                available    [ =stable ]
  •  Enable the repository before using it.
  • sudo amazon-linux-extras enable python3.8 


  • Install Python 
    • sudo yum install python3.8


Tuesday, October 5, 2021

Installing packages using pip and virtual environments


Installing packages using pip and virtual environments

This guide discusses how to install packages using pip and a virtual environment manager: either venv for Python 3 or virtualenv for Python 2. These are the lowest-level tools for managing Python packages and are recommended if higher-level tools do not suit your needs.

Note


This doc uses the term package to refer to a Distribution Package which is different from an Import Package that which is used to import modules in your Python source code.

Installing pip

pip is the reference Python package manager. It’s used to install and update packages. You’ll need to make sure you have the latest version of pip installed.

The Python installers for Windows include pip. You can make sure that pip is up-to-date by running:

py -m pip install --upgrade pip

py -m pip --version

Afterwards, you should have the latest version of pip:

pip 21.1.3 from c:\python39\lib\site-packages (Python 3.9.4)

Installing virtualenv

Note


If you are using Python 3.3 or newer, the venv module is the preferred way to create and manage virtual environments. venv is included in the Python standard library and requires no additional installation. If you are using venv, you may skip this section.

virtualenv is used to manage Python packages for different projects. Using virtualenv allows you to avoid installing Python packages globally which could break system tools or other projects. You can install virtualenv using pip.

py -m pip install --user virtualenv

Creating a virtual environment

venv (for Python 3) and virtualenv (for Python 2) allow you to manage separate package installations for different projects. They essentially allow you to create a “virtual” isolated Python installation and install packages into that virtual installation. When you switch projects, you can simply create a new virtual environment and not have to worry about breaking the packages installed in the other environments. It is always recommended to use a virtual environment while developing Python applications.

To create a virtual environment, go to your project’s directory and run venv. If you are using Python 2, replace venv with virtualenv in the below commands.

py -m venv env

The second argument is the location to create the virtual environment. Generally, you can just create this in your project and call it env.

venv will create a virtual Python installation in the env folder.

Note


You should exclude your virtual environment directory from your version control system using .gitignore or similar.

Activating a virtual environment

Before you can start installing or using packages in your virtual environment you’ll need to activate it. Activating a virtual environment will put the virtual environment-specific python and pip executables into your shell’s PATH.

.\env\Scripts\activate

You can confirm you’re in the virtual environment by checking the location of your Python interpreter:

where python

It should be in the env directory:

...\env\Scripts\python.exe

As long as your virtual environment is activated pip will install packages into that specific environment and you’ll be able to import and use packages in your Python application.

Leaving the virtual environment

If you want to switch projects or otherwise leave your virtual environment, simply run:

deactivate

If you want to re-enter the virtual environment just follow the same instructions above about activating a virtual environment. There’s no need to re-create the virtual environment.

Installing packages

Now that you’re in your virtual environment you can install packages. Let’s install the Requests library from the Python Package Index (PyPI):

py -m pip install requests

pip should download requests and all of its dependencies and install them:

Collecting requests
  Using cached requests-2.18.4-py2.py3-none-any.whl
Collecting chardet<3.1.0,>=3.0.2 (from requests)
  Using cached chardet-3.0.4-py2.py3-none-any.whl
Collecting urllib3<1.23,>=1.21.1 (from requests)
  Using cached urllib3-1.22-py2.py3-none-any.whl
Collecting certifi>=2017.4.17 (from requests)
  Using cached certifi-2017.7.27.1-py2.py3-none-any.whl
Collecting idna<2.7,>=2.5 (from requests)
  Using cached idna-2.6-py2.py3-none-any.whl
Installing collected packages: chardet, urllib3, certifi, idna, requests
Successfully installed certifi-2017.7.27.1 chardet-3.0.4 idna-2.6 requests-2.18.4 urllib3-1.22

Installing specific versions

pip allows you to specify which version of a package to install using version specifiers. For example, to install a specific version of requests:

py -m pip install requests==2.18.4

To install the latest 2.x release of requests:

py -m pip install requests>=2.0.0,<3.0.0

To install pre-release versions of packages, use the --pre flag:

py -m pip install --pre requests

Installing extras

Some packages have optional extras. You can tell pip to install these by specifying the extra in brackets:

py -m pip install requests[security]

Installing from source

pip can install a package directly from source, for example:

cd google-auth
py -m pip install .

Additionally, pip can install packages from source in development mode, meaning that changes to the source directory will immediately affect the installed package without needing to re-install:

py -m pip install --editable .

Installing from version control systems

pip can install packages directly from their version control system. For example, you can install directly from a git repository:

git+https://github.com/GoogleCloudPlatform/google-auth-library-python.git#egg=google-auth

For more information on supported version control systems and syntax, see pip’s documentation on VCS Support.

Installing from local archives

If you have a local copy of a Distribution Package’s archive (a zip, wheel, or tar file) you can install it directly with pip:

py -m pip install requests-2.18.4.tar.gz

If you have a directory containing archives of multiple packages, you can tell pip to look for packages there and not to use the Python Package Index (PyPI) at all:

py -m pip install --no-index --find-links=/local/dir/ requests

This is useful if you are installing packages on a system with limited connectivity or if you want to strictly control the origin of distribution packages.

Using other package indexes

If you want to download packages from a different index than the Python Package Index (PyPI), you can use the --index-url flag:

py -m pip install --index-url http://index.example.com/simple/ SomeProject

If you want to allow packages from both the Python Package Index (PyPI) and a separate index, you can use the --extra-index-url flag instead:

py -m pip install --extra-index-url http://index.example.com/simple/ SomeProject

Upgrading packages

pip can upgrade packages in-place using the --upgrade flag. For example, to install the latest version of requests and all of its dependencies:

py -m pip install --upgrade requests

Using requirements files

Instead of installing packages individually, pip allows you to declare all dependencies in a Requirements File. For example you could create a requirements.txt file containing:

requests==2.18.4
google-auth==1.1.0

And tell pip to install all of the packages in this file using the -r flag:

py -m pip install -r requirements.txt

Freezing dependencies

Pip can export a list of all installed packages and their versions using the freeze command:

py -m pip freeze

Which will output a list of package specifiers such as:

cachetools==2.0.1
certifi==2017.7.27.1
chardet==3.0.4
google-auth==1.1.1
idna==2.6
pyasn1==0.3.6
pyasn1-modules==0.1.4
requests==2.18.4
rsa==3.4.2
six==1.11.0
urllib3==1.22

This is useful for creating Requirements Files that can re-create the exact versions of all packages installed in an environment.

How IdP Groups Are Tied to Databricks Groups (Unity Catalog)

  🔗 How IdP Groups Are Tied to Databricks Groups (Unity Catalog) 🔑 Key Principle (Read This First) Databricks does NOT “map” IdP groups...